Register Apple Merchant ID following the instruction register merchant ID at Apple Developer site.
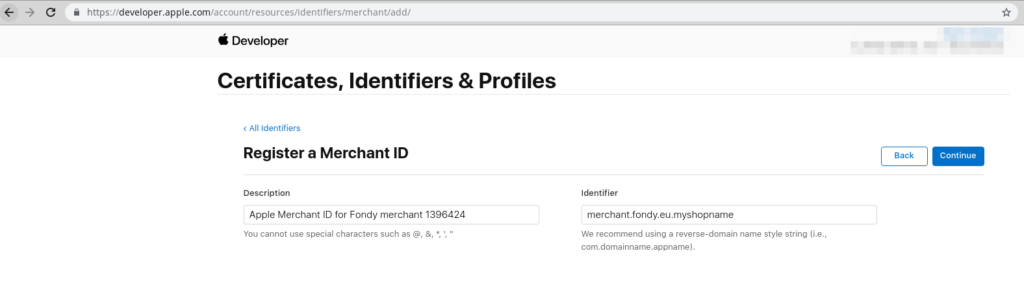
Fill out the form with a description and identifier. Your description is for your own needs and may be changed in the future (we recommend using the name of your mobile application). The identifier must be unique (in all Apple applications, not just yours) and cannot be changed later (although you can always create another). We recommend using merchant.fondy.eu.{{Your_app_name}}. Keep this value for future reference when developing the application.
Detailed instruction:
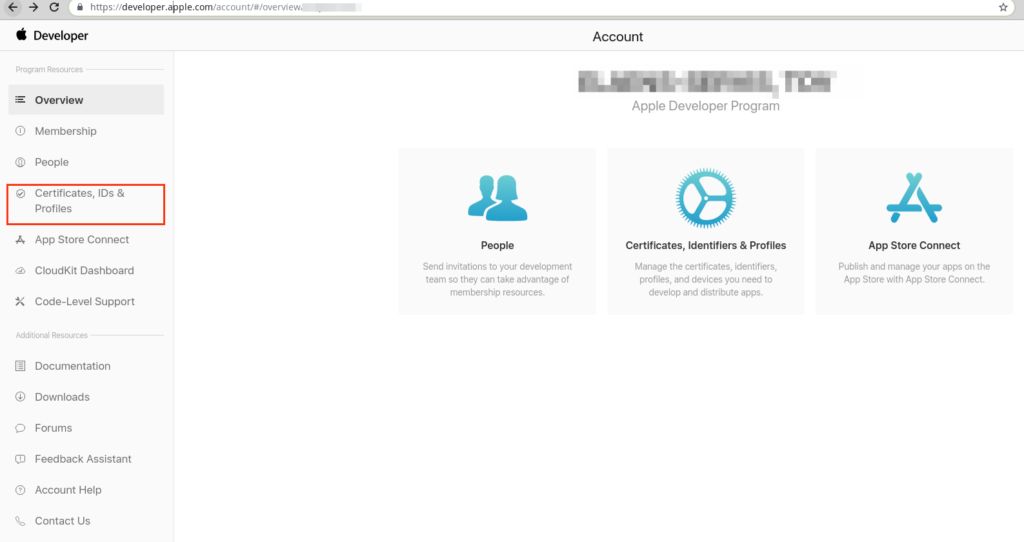
1.1 Go to the Dashboard of your account in Apple Developer https://developer.apple.com/account/#
1.2 Open menu Certificates, Identifiers & Profiles
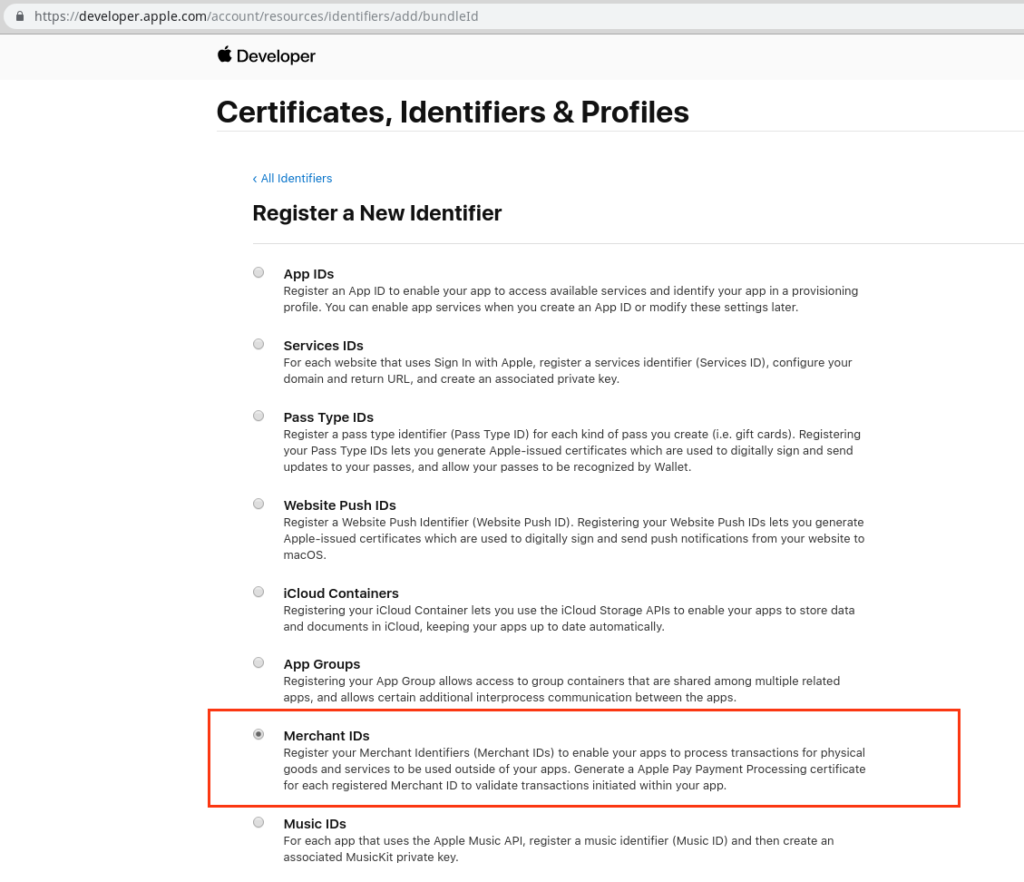
1.3 In menu Identifiers click + to create Merchant ID: https://developer.apple.com/account/resources/identifiers/add/bundleId
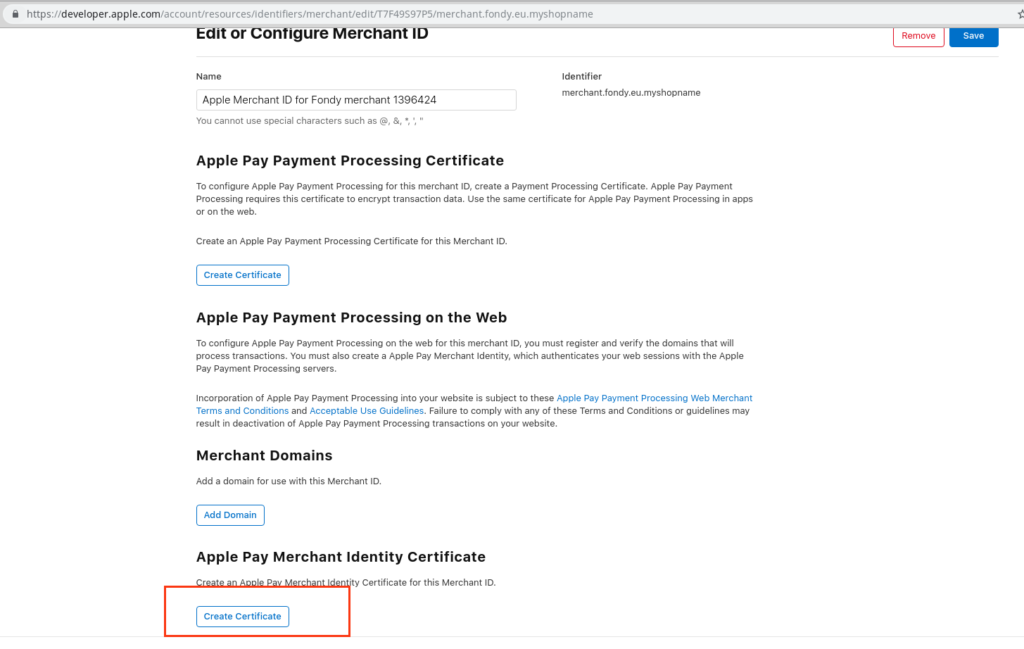
1.4 Fill out Description and Identifier (merchant.fondy.eu.{{Your_app_name}}.):
You need to add the certificate to your application to encrypt payment data. To do this, follow 3 steps:
2.1 Provide the information necessary for generating the CSR file to the Fondy support team. To do this, please fill in where the sign “?” is placed:
Country Name (2 letter code) [AU]: ?
State or Province Name (full name) [Some-State]: ?
Locality Name (eg, city) []: ?
Organization Name (eg, company) [Internet Widgits Pty Ltd]: ?
Organizational Unit Name (eg, section) []: ?
Common Name (e.g. server FQDN or YOUR name) []: ?
Email Address []: ?
2.2 Obtain 2 CSR files (Certificate Signing Request) from Fondy:
Apple Pay Payment Processing Certificate Request
Apple Pay Merchant Identity Certificate Request
2.3 Use these CSR files to generate certificates to complete 1.4
section Apple Pay Payment Processing Certificate:
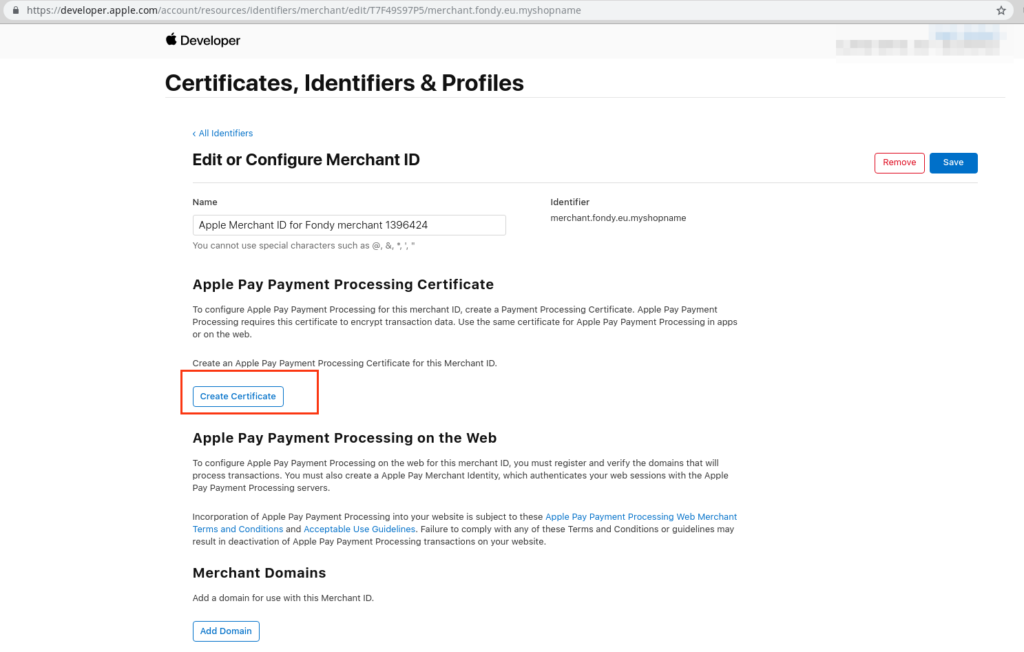
section Apple Pay Merchant Identity Certificate :
2.4 Download and send obtained certificates back to Fondy.
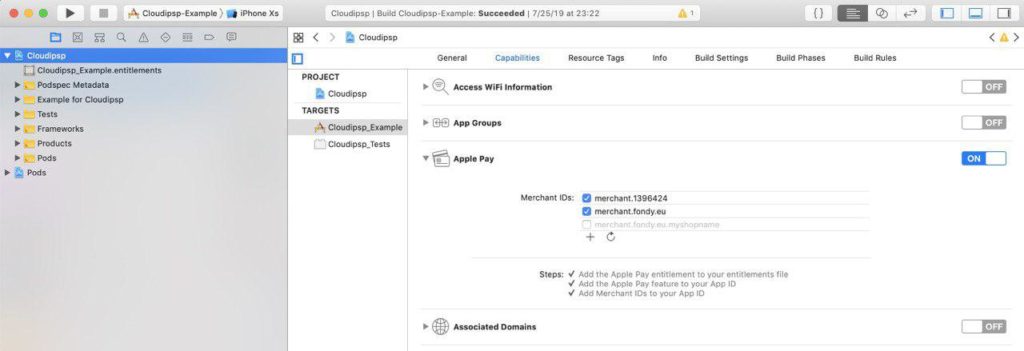
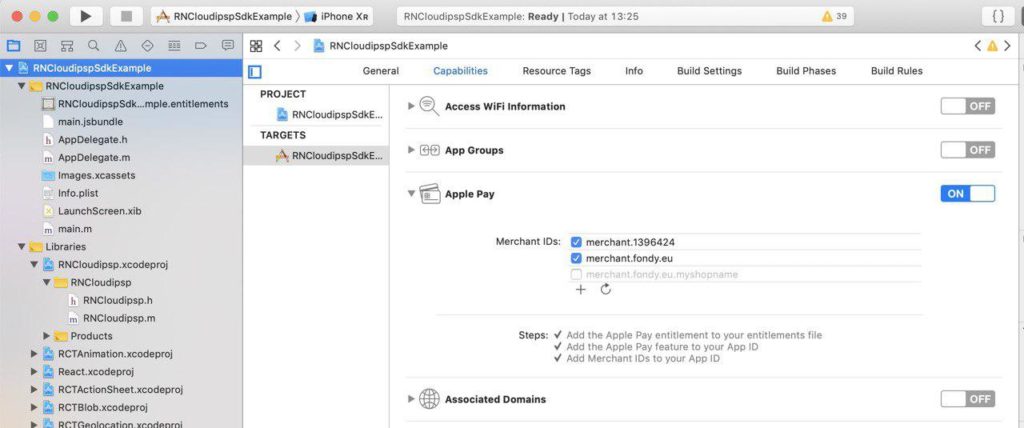
The final step in this process is to add the Apple Pay feature to your application. In Xcode, open your project’s settings, select the “Capabilities” tab, and turn on the Apple Pay switch. At this point, you may be prompted to log in to your developer account. Check the box next to the Merchant ID you created earlier and you’re done!
3.2 in integration SDK set merchant_id received during registration in Fondy Merchant-Portal in constructor instead of test 1396424
self.api = [PSCloudipspApi apiWithMerchant:1396424 andCloudipspView:self.webView];
github line link:
3.4 in integration SDK set merchant_id received during registration in Fondy Merchant-Portal in constructor
this.api = new Cloudipsp(<your Fondy merchant_id>, this.cloudipspWebView);
github line link:
If you prefer to integrate directly against the Apple Pay API, follow Apple’s instructions.